Organisations that manage diverse user bases and want to ensure secure access to their environments often seek to implement standardised authentication protocols in their IT ecosystems. OAuth2, recognised for its wide adoption in token-based authentication, has become widely used for ensuring secure access for users, ensuring the protection of their credentials, and granting access only to authorised entities.
The introduction of OAuth2 Authentication in CloudStack 4.19 represents a significant step towards improving security and user management. This functionality allows organisations to integrate CloudStack with their existing OAuth2 authentication providers, including support for popular platforms such as GitHub and Google OAuth2.
Go through a demo of the feature and then follow the steps for configuration:
Steps to Configure OAuth2 in CloudStack
To configure the OAuth2 in CloudStack, Admin User will need to:
1. Enable “oauth2.enabled” in “Global Setting”.
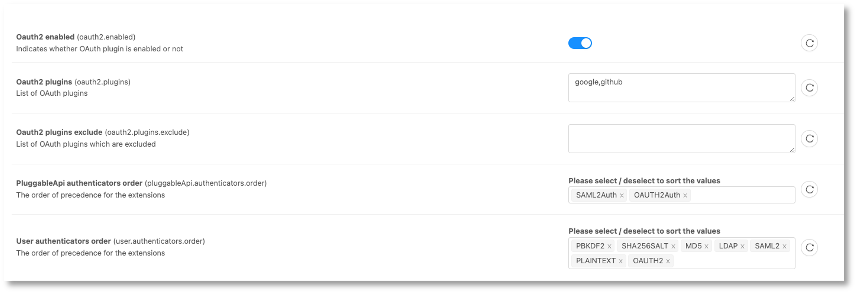
2. Setup one or both OAuth2-supported providers: GitHub and / or Google.
3. Register the providers you select into CloudStack.
4. Ensure that the user’s email address in CloudStack matches the one used for OAuth authentication, as this email is crucial for user identification within CloudStack.
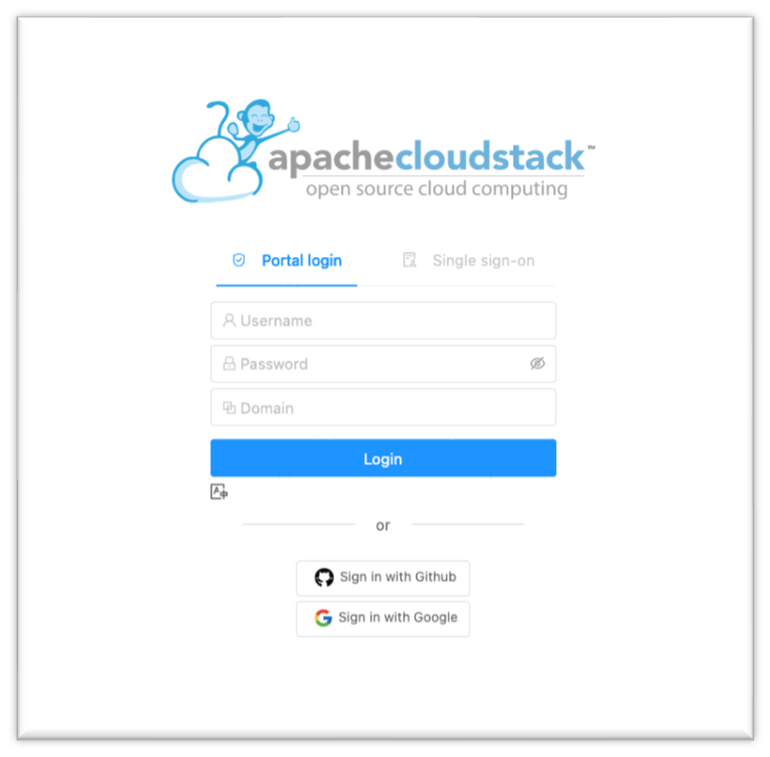
Once these steps are completed, the CloudStack login page will display options to the users to sign in using the OAuth2 providers that you have configured.
Configuring and Registering OAuth2 Providers
The CloudStack OAuth2 feature has added a new option within the ‘Configuration’ section of the side menu. From this point, Admin users can manage the OAuth2 providers.
In order to add a new OAuth2 provider, Administrators are required to supply the client ID, redirect URI, and secret key. Therefore, it’s necessary to set up OAuth 2.0 with the respective provider in advance to acquire these credentials. Please adhere to the provided instructions for this setup:
• Github: https://docs.github.com/en/apps/oauth-apps/building-oauth-apps/creating-an-oauth-app
• Google, https://support.google.com/cloud/answer/6158849
When configuring the OAuth provider, administrators should use the redirect URI formatted as “http://<management server IP>:<port>/?verifyOauth.”
The OAuth2 registration form in CloudStack is presented as follows, along with descriptions of each parameter:
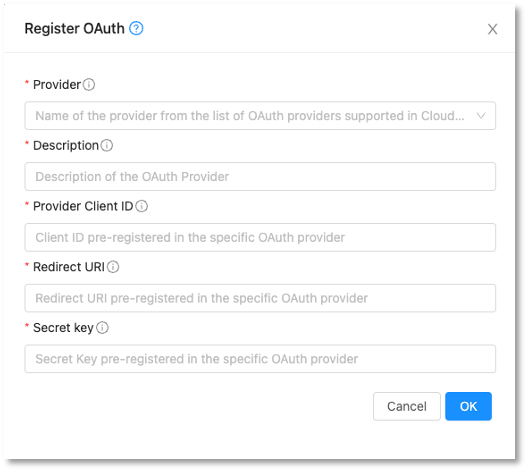
• Provider: Name of the provider from the list of OAuth providers supported in CloudStack.
• Description: A short description of the provider.
• Provider Client ID: Client ID pre-registered in the specific OAuth2 provider.
• Redirect URI: Redirect URI pre-registered in the specific OAuth2 provider.
• Secret Key: Secret Key pre-registered in the specific OAuth2 provider.
For additional information about the CloudStack OAuth2 Feature, please refer to the following source. http://docs.cloudstack.apache.org/en/latest/adminguide/accounts.html#using-oauth2-authentication-for-users
User Experience
After setting up the OAuth2 provider, Users can log into the CloudStack UI using their GitHub or Google accounts. The CloudStack will link to the email address tied to the user’s account and direct them to the chosen OAuth2 provider. Once logged in, users can start using CloudStack.
When OAuth2 is enabled and the providers are configured, the CloudStack login page will display options for users to sign in with their accounts from services like GitHub or Google as illustrated below:
Conclusion
The OAuth2 feature in Apache CloudStack 4.19 LTS represents a significant advancement in user access and security. Not only does this feature ensure a secure and consistent authentication mechanism, aligned with compliance standards in organizations’ IT and cloud environments, but it also provides simplified configuration steps. With its compatibility with popular providers like Google and GitHub, it allows administrators to seamlessly integrate OAuth2. This integration increases security by utilizing trusted and widely recognized authentication methods, providing a more convenient and modern authentication experience in the CloudStack environment.
Harikrishna works at ShapeBlue as a Software Engineer, and is also engaged with active development of new features and capabilities for the Apache CloudStack project. He has been working on CloudStack since 2012 and is a committer in this project. Before joining ShapeBlue, Harikrishna worked for Citrix Systems and Accelerite. He holds an M.Tech in Computer Science and Engineering from IIT-Madras.
You can learn more about Harikrishna and his background by reading his Meet The Team blog.
